
Kerygma
This guide will walk you through setting up a site with our Kerygma theme.
Follow our documentation to learn how to set up the demo for Kerygma.
Theme Options
Upon installing and activating the theme, you’ll be redirected to the Theme Options page. This screen gives you the ability to set the options that are built into the theme such as appearance, branding, and podcast feeds.
The theme options are broken down into tabs that contain related options. Here’s a rundown on what each tab does:
- Header
- These options include the logo, navigation menu, sticky header (Background color can be changed in Appearance > Theme Options > Header), shortcut favicons and hero section fonts.
- Background
- The background tab allows you to set a background color and optionally a background image. This is not where you add an image for the hero section at the top of each page. Those will be added by editing those pages directly.
- Content
- This tab gives options related to the main content area of the theme.
- Footer
- Add custom text for your footer here as well as colors. To add social icons, you’ll need to create a navigation menu (see that section below). This is where you choose the number of columns you’d like your footer to have.
- Sidebar
- Colors and fonts for sidebar widgets.
- Buttons
- Set the colors of your buttons (hover and regular state).
- Audio Feed
- These options allow you to enter the information for your podcast audio feed.
- It works with the Podcast Audio Feed template to create a feed you can use to allow visitors to subscribe to your podcast.
- Video Feed
- Essentially the same options as the audio feed, just for video instead.
- Advanced
- The advanced tab offers the ability to change the URL for your staff section, turn off Google fonts, theme updates and add any custom CSS.
The buttons to save the theme options are at the bottom of the page. You can create a backup of the options too. In the appearance section you’ll see a menu item for Options Import/Export. There you can create a backup of your options, or import previously saved ones.
Homepage
To set up your homepage, first go to the pages section in your WordPress control panel and select Add New. Look in the right hand column of the Add New screen and you’ll see a section for Page Attributes. Under that, you’ll see Template and a dropdown menu for Template. From that dropdown choose “Full Width Without Title” or “Homepage – Widgets” and publish the page. Full Width Without Title is a template that allows you to create a layout similar to the one on Kerygma’s demo homepage, which uses the SiteOrigin Page Builder. Homepage – Widgets uses the older widget-based system that Kerygma used before our 2018 redesign, which gives you less freedom (yet a more straightforward way) to built a layout. We suggest using Full Width Without Title. Make sure that you’re using the Classic Editor instead of the Block Editor (Gutenberg). If you don’t have it, download it as a plugin and set it as the default editor in Settings > Writing.
Next, go to the Settings section in your WordPress control panel and click on Reading. At the top of this screen, you can choose what your front page displays. Choose a static page and then from the top drop-down menu there, select the homepage you just created.
Kerygma’s homepage includes 2 different layouts.
The first and newer one (2018 redesign) is built using the free SiteOrigin Page Builder. This means that you can create and edit the layout to your desired one by dragging and dropping sections, rows, columns, widgets, and more. Keep reading to learn how to use the page builder. Ensure that you have installed the recommended plugins after activating Kerygma.
These are the recommended plugins:
Page Builder by SiteOrigin
SiteOrigin Widgets Bundle
The Events Calendar
Black Studio TinyMCE Widget
Contact Form 7
The newer design has a section that features alternating images and text towards the bottom. The recommended image size is 1200px x 800px.
The second and older one (2014 design) consists of widgets. You can still use this layout by first going to the Home 2 page (found in Pages or under the menu Home), and then going to Appearance > Widgets (or Appearance > Customize > Widgets). Just make sure to disable the page builder for the homepage by editing the homepage and clicking the “Revert to Editor” button found above the main content text box). Here is a breakdown of the widgets that are used on the homepage in the demo of the old design:

There are 2 ways to control what widgets show up.
The newer way that gives you more flexibility to customize the layout:
Edit the homepage (and any other page, including new ones that you create) and begin using SiteOrigin Page Builder. There’s a great tutorial detailing how to get started with this free page builder.
The older way that is easier but has a predetermined (yet still customizable) layout:
Widgets are added by going to the Appearance section and selecting Widgets (Or Appearance > Customize > Widgets for the live view). The section in the middle lists the available widgets. The portion on the right has the widget areas in the theme. The default sidebar will appear on inside pages/posts. The Home Widgets is where widgets placed on the homepage will be visible.
Navigation & Social Icons
To set up your navigation menus, go to the Appearance section and select Menus. On this screen you can create the navigation that your visitors will use to browse your site. Here’s a quick video that explains how WordPress navigation works:
 The social icons in the footer (bottom right) also are made with a navigation menu (or, if you’d rather have your social media icons as a column in the Footer, then you can manage those in Appearance > Customize > Widgets > Footer). If you have text entered in Appearance > Customize > Footer > “Custom Footer Text (Right)”, then your social media icons won’t show up. Remove that text first by emptying that field.
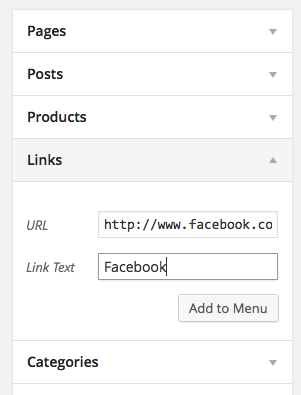
To add those social media links, create a new menu. Look in the left hand column for the “Custom Links” tab. You’ll use this to add in your social icons. Just enter the full URL to your social media profile in the URL field. Add a label (Link Text) for it, the name of the network would be a good idea. Then, click the add to menu button to add the link to your navigation menu and drag and drop it to your desired order. Repeat that for all the networks you’d like to add and save your menu. Then, assign your menu to the “Social Icons” menu location. That will cause your icons to be visible there.
Here are the social networks with built-in icons:
- YouTube
- Skype
- Vimeo
- Google Plus
- Flickr
- Dribbble
Podcasting
Podcasting is at the heart of the Kerygma theme. To begin, go to the Podcast section in your WordPress dashboard. Click Add New to create your first podcast episode. In many ways this works just like adding a post.
The title of the episode is placed at the top. Any text that you would like to include is added to the main content box.
To the right of the main content box you’ll see two boxes, one for series and one for speaker. These are ways you can associate your messages together. The series are for grouping messages together into series. The speakers box is for adding speakers to your messages. Both of these will form archives that can be clicked on by your visitors to see all the messages in your series and every message by the same speaker.
Below the main content box is another box that allows you to add the media for your podcast episodes. Here you can upload audio files, notes files (PDFs) and video files.
If a video file is uploaded, it will be displayed in place of a featured image at the top of the page. To display video, it’s recommended that a third party service like Vimeo or YouTube be used if possible. There is a box in this section where you can place the embed code from one of these services and it will be used at the top of the page.
Important:
When you add a message audio file, you will see the field ‘Link URL’ kept empty. If it’s empty, and you click on ‘Use as Message Audio File’, your audio file won’t be added to the Message Audio File field and will get a blank pop-up. Instead, for the Link URL field, click either ‘File URL’ or ‘Attachment Post URL’. This will fill the field with the URL. You can then click on ‘Use as Message Audio File’.
Series
One of the key features of Kerygma is the utilization of message series. To create and edit your series, go to the Podcast section and choose series. Here you can create and edit series. Each series can have a title, description and series graphic. It’s recommended that each series use all three of these. As the series are created, you can add your podcast episodes to them.
Displaying Podcasts
To display your podcasts, go to the pages section in your WordPress control panel and select Add New. On the new page screen, look on the right hand side for the templates drop-down menu. From that drop-down, choose “Podcast Series List” and publish your page. This will create a page for your site that lists all the podcasts series that have episodes published in them.
Hero Section
Kerygma has the ability to display large “hero” style images and text at the top of a page. When you’re editing a page, look below the main content box and you’ll see one that contains the hero section. There you can choose the hero height and enter a hero title and caption. It’s also possible to create a button with a link there as well.
You can choose colors for the hero title, caption and button as well as the navigation menu too. That way you can choose text that shows up nicely against your images.
The actual image that is displayed is the “featured image” of the page. You can add that in the right hand column in the “featured image” box.
Staff
To create a directory of your staff members, first go to the Staff section in your WordPress control panel. Here you can create your staff members. Each staff member should add in an image. Their name should go in the spot at the top and their bio in the main content box. There are fields below that where you can enter their email address and phone number. You can also add links to their profiles on various social networks. To include a network, just enter the URL to their profile in one of the spots and it will be displayed on the front end. Here are the supported networks:
- YouTube
- Vimeo
- Skype
- Google Plus
- Flickr
- Dribbble
Once you’ve created your staff members, go to the pages section again and create a new page. In the right hand column, choose the “Staff List” template and publish your page. This will display all your published staff members on one page.
Page Builder
To have maximum flexibility in building a page, Kerygma is designed to work with the Page Builder plugin. This plugin replaces your default WordPress content with a different editor. It breaks your content up into rows which are then filled with widgets in the number of columns you choose.
In Kerygma, we’ve added widgets to help build your site and also to offer some additional design options. Let’s look at how the front page of the demo is made.
-
Create a Page
Start out by creating a page. At the top of the main content box you’ll see a tab that says “Page Builder”. Click on that. You’ll now see the page builder interface instead of the default WordPress one.

-
Create a Row
Start out by clicking on the “Add Row” button to create your first row. Now that you’ve inserted your first row, you’ll see a pop up that lets you choose the number of columns. The default you’ll see is two but you can choose just about any number you want. Realistically, you’ll want to choose a number between one and at most five or six. You can change this number later if you’d like to.
Use the box for column number to change that to your desired number of columns and click insert. You’ll now see an empty blue box that represents your row. At the top right of that box, you’ll see a wrench. When you hover over the wrench with your mouse, it will give you a dropdown with options. Click on “Edit Row”.
You’ll now see a pop up where you can edit the number or columns in this row. You’ll also see new options on your right. These options are broken up into four sections:
- Attributes: this section lets you add ID and CSS classes to the row, the “cells” (the widgets in that row) as well as any CSS to be applied to that row. It’s useful for advanced customizations.
- Layout: here you can set options that pertain to the size and position of this row.
The bottom margin option lets you set the distance between this row and the one below it.
The gutter is the space between widgets and the padding is the space around the inside of your row.
The padding section adds space around that row, and that space can be used to make the row look bigger as padding works by adding space that is part of a row rather than outside of a row/element, such as in the case of Margins. Margins separate elements and padding make an element larger/longer. It can take multiple values. You can set the top, right, bottom, and left values by adding them in that order. To have 30 pixels of padding on the top and bottom and 15 on right and left, you would enter 30 15 30 15 into the padding box.
Row Layout: Standard – it will make that row into a boxed layout (not full width / edge to edge). Among the full width choices, you’ll most likely want to use “Full Width Stretched” as it stretches the row to its fullest extent. If you find that it is touching the edges when you don’t want it to, then choose “Full Width Stretched Padded”. - Mobile Layout: here you can set options that pertain to the size and position of this row in mobile view.
Mobile Bottom Margin lets you set the distance between this row and the one below it.
Mobile Cell Margins lets you set the vertical distance between the widgets.
Mobile Padding adds space around that row, and that space can be used to make the row look bigger as padding works by adding space that is part of a row rather than outside of a row/element, such as in the case of Margins. Margins separate elements and padding make an element larger/longer. It can take multiple values. You can set the top, right, bottom, and left values by adding them in that order. - Design: here you can add a background image to the row, choose how it is displayed, and also set the border color.
Any of these options can be changed at any time, so feel free to experiment.
-
Add Widgets
The content in the page builder is made up of widgets. To add a widget, click on the “Add Widget” button. This will open up a pop up where you can select the widget you’d like to add.
To edit a widget, hover over it and click “Edit” or right click that widget and click on “Edit Widget”.
Once you’ve added your widgets, save them by clicking the done button that’s in the bottom right of the pop up. Then, save your page.
-
Other Page Options
There are some additional page options. If you’ll look below the page builder editor, you’ll see a box labeled “Hero Area Options”. The options are pretty self-explanatory. This is also the area where you can add a self-hosted or YouTube video hero. You can also use the Page Builder by SiteOrigin to add a video widget in other locations and not just the hero area.
That finishes up the short introduction to the page builder. It’s a very flexible tool that you can use to create the layout you’re looking for.
Footer
At the bottom of each page, you’ll notice footer widgets. The theme has a spot for widgets there. You can choose the number of columns that you would like. Navigate to your WordPress dashboard > Appearance > Customize > Footer and choose the number of columns you’d like under “Footer Columns Number”. Then, in Appearance > Customize > Widgets > Footer, you can choose the widgets you’d like to use there.
You can also make use of the “Layout Builder” widget there. This unique widget lets you add other widgets inside it, just like you would a page that’s using the page builder.
To remove the left copyright or right Organized Themes icon or social media icons (if you have that Social Networks menu selected there under Appearance > Menus), navigate to Appearance > Customize > Footer and type your own text in “Custom Footer Text (Left)” and “Custom Footer Text (Right)”. If you don’t want any text there, simple enter a “space” there (meaning, press your space key once in those fields) and it will keep those areas without any content.
Troubleshooting
- If you notice some extra spacing between elements, navigate to your WordPress dashboard > Settings > Page Builder and click on the Layout tab. If “Row Gutter” and “Row/Widget Bottom Margin” have a value other than 0, remove that value, type 0, and save.
If you still notice spacing, then it could be that you manually added a number that is higher than 0 to the Gutter, Margin, or Padding settings when you edited a row.
Widgets have margin and padding settings as well, so make sure to verify those.
Lastly, if you still have unwanted spacing, if you added CSS code either in Appearance > Customize > Additional CSS or in a child theme, verify those to see if you added spacing there. - If columns aren’t displaying as intended, or some sections are not resizing properly, or it looks different from our demo, such as images displayed vertically rather than horizontally, navigate to your WordPress dashboard > Settings > Page Builder > Layout. Choose “Always” for this setting: Use Legacy Layout Engine.
Image Sizes
Here are the recommended image sizes for use with the theme:
Staff — 400 pixels wide by 600 pixels tall
Podcast — 960 pixels wide by 540 pixels tall
Full Hero — 2000 pixels wide by 1400 pixels tall
Normal Hero — 2000 pixels wide by 600 pixels tall
Small Hero — 2000 pixels wide by 300 pixels tall
Homepage alternating image/text — 1200 pixels wide by 800 pixels tall
We hope you enjoy using Kerygma. If you have any questions, please feel free to check our forum or contact us and we’ll be happy to help.