
Finesse
Getting Started with Finesse
We created Finesse to be simple, yet very flexible. You do not have to follow everything in this guide. It’s here to be a reference if you have any questions about how a particular part of the theme works. The guide is also written from the perspective of setting up a new site. If you’re adding Finesse to an existing site, you’ll likely have already done some of these steps.
Follow our documentation to learn how to set up the demo for Finesse.
Customizer
The customizer is a great tool that you’ll use setting up your site. To find it, go to the Appearance section in your WordPress dashboard and click on Customize. This will open up a new screen. You’ll see a live preview of your site on the right hand side. On the left you’ll find a list of several option sections that you’ll be using. Here’s what’s inside each section:
Branding
Our first section allows you to add your logo and favicon (the small icons that go in a web browser’s navigation bar) to your site.
Header and Navigation
This section allows you to assign navigation menus to the theme’s menu locations. You can also customize the appearance of your navigation menu using the font, size and color options here as well.
Styling
This section contains the styling options for the major parts of the theme. You can add a background, pick fonts, colors and assign them to elements that you’d like to use them with.
Shop Options
This section allows you to choose colors that are specific to the shop section of the site: sale colors, price colors, notification highlight colors.
Also here you can set options for what is displayed in your shop and what you’d like to leave out.
Widgets
The widget panel allows you to add widgets to your site. These are small blocks of content or functionality that you can use to enhance your site. This widget panel will only show widget areas (sometimes called sidebars) that are on the page being viewed in the preview. You can also add widgets by going to the widget screen in the Appearance section of your WordPress dashboard.
Home Page
Here you can choose what your front page displays. By default WordPress shows the latest blog posts, but you can select any page to be displayed instead. You can also assign a different page to serve as your blog page here.
Advanced
This last panel has options to disable the smooth transitions and link scrolling that Finesse uses. It also has a box where you can enter any CSS that you would like to apply to the site.
One of the greatest aspects of the customizer is you can see changes live on your site, before you save them. That way you don’t have to commit to something that isn’t quite right.
Creating a Hero Image
A hero image is a large, full width image that covers the top of a webpage. In Finesse you can have a hero section on any page or post you’d like to. First create a new page or edit an existing one. Under the main content box you’ll see another box labeled “Hero Area.” At the top there you’ll see a option that lets you include a hero on that page. Choose to include a hero there and additional options will open up for you.
“Hero Slides” are what hold the content in your hero. You can have a hero that has only one slide, or you can create more than one and have slideshows.
Each slide can have a title, caption and button. These are all optional, but they are available to use if you’d like to. Every slide needs to have either an image or a video. To use an image, click on the Add or Upload file button by the Background Image field. That will open up the WordPress media library where you can either upload or select an existing image. You can also upload a separate image for smaller screens if you’d like to.
To make a video hero, you can either enter the URL to a YouTube video or upload your own videos. If you do upload your own videos, you will need to upload the same video in MP4, WebM and OGG formats in order to cover all web browsers. You can use the video converter at http://www.online-convert.com to create all the formats you need. You can also add a poster image which will appear while your video is loading.
Each slide can also have different colors for the title, caption and buttons. They can also be aligned to the left, center or right on an individual basis.
To create additional slides, click the new slide button at the bottom of your first slide to make another one. You can create as many as you need, though it’s recommended that you don’t create too many as the large images and/or videos can slow the site down, especially if there are lots of them.
At the bottom of the hero area box you’ll find options for the hero on this page. These are items that affect all slides. You can set the height of the hero area, choose the transition options if you’re making a slideshow. You can also set a different logo and/or navigation item colors. That’s helpful if one page’s hero doesn’t work with the colors in your logo or navigation.
You can create a hero area on any page or product.
Page Builder
Any page or product can also use the optional page builder. What this does is allow you to create different layouts that you could otherwise all inside of WordPress.
To make this possible, we use a plugin called Page Builder by SiteOrigins. Most likely you saw a prompt to install the plugin when you activated Finesse. Here is a quick video to show you how it works:
What Page Builder does is create another editor tab that you can use to create drag and drop layouts. These layouts are built with familiar WordPress widgets.
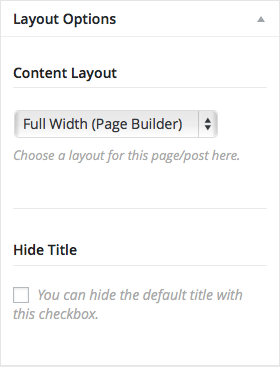 By default each page and product will use the typical WordPress editor and a linear layout. To create a custom layout, when you’re editing a post, look in the right hand column. There you’ll see a box for layouts. In the drop down menu there, choose the full width option. Then look at the top of the main content box. There you’ll see tabs labeled “Visual,” “Text,” and “Page Builder.” Click on the Page Builder one to get started creating your layout.

The page builder breaks its content up into rows. To get started, click on the Add Row button. This will open up a quick modal window where you can select the number of columns that will be present as well as how wide they are. This can be changed at any time if you need to.
On the right hand side of the modal you’ll find a section called Row Styles. This spot allows you to add styling for this specific row. Under layout you can add a bottom margin if you’d like to have a space between this row and the one after it. The gutter is the distance between the columns.
Lastly there is an option for padding. This is the space inside the row that separates the content from the edge of the row. You can enter multiple values for padding here if you’d like to. Say you want to have 20 pixels on the top and 5 pixels on the sides and bottom, you would enter this:
20 5 5 5
The padding follows this arrangement: top, right, bottom, left. If you only enter one value, that value will be used on all sides.
The design section allows you to add a background color and image. It’ll also let you specify how the background image works. It can repeat, be fixed in place, cover the whole background of the row, or always show the entire image. You can also specify a text color here.
The attributes section has some more advanced options. You can add a class to this row, the cells in the row, or a bit of CSS directly to the row.
Once you’ve finished, you can click the save button. If you need to access these options again, click on the wrench icon that’s at the top right of the row.
To add a widget, click the add widget button in the page builder toolbar. This will open up a modal window where you can select a widget to use. Once you click on it, it’ll be added to the last row. You can move the widget around by clicking on it and dragging it to the spot where you need it to go.
One suggested plugin is the BlackStudio TinyMCE widget. This adds a visual editor widget that uses the editor from the WordPress page/post screen. That way you have the styling toolbar, insert media buttons and so on right there to use.
You can also see a live preview of your page. To do that, click on the Live Editor in the Page Builder toolbar. This will open up a small version of the customizer so that you can edit this page/product.
Each cell can also have its own styling. It works in similar fashion to the rows, except that it only applies to one cell.
Shortcodes
Buttons
You can insert a button that points to the URL of your choice by using the button shortcode. This shortcode takes a few options. Here is an example:
The URL is the address you’d like the button to link to. The label is the text that will be displayed in the button. There is also an option to add an HTML “class” to the button. In WooCommerce the add to cart button on a product page and a few other key spots use a class called “alt.” If you’d like to style your button to be like these, your shortcode would look like this:
If you’d added other classes that you’d like to apply, you can swap alt out for those.
WooCommerce Shortcodes
WooCommerce has quite a few built in shortcodes that are documented at http://docs.woothemes.com/document/woocommerce-shortcodes/. There is also a companion plugin for these that you can install (https://wordpress.org/plugins/woocommerce-shortcodes/).
Add to Cart with Variations
WooCommerce’s add to cart shortcode does not work with products that have variations. Our Extras plugin includes an add to cart shortcode that also displays variations. Here’s the shortcode:
If you’re adding this to a product, it will show the add to cart button for that product. If you’re adding this to a WordPress page, then you’ll need to specify which product by adding an ID like this:
where the 30 is the ID number of that product. You can find the ID number by going to the products section in your dashboard. In the list of products on your right, the ID is listed below the name of each product.
Product Tabs — Description, Reviews, Additional Information
You can insert the default WooCommerce product tabs with this shortcode:
Again if you’re adding these outside of a product, you’ll need to add the product’s ID so WordPress knows which product you’re working with.
Star Rating
You can include the rating for a product with this shortcode:
The product ID is also optional here as well.
Upsells
You can display any available upsells with this shortcode:
Product Thumbnails
This will insert the thumbnails you’ve selected in the product gallery.
Featured Image
You can also insert the featured image for your product by using this shortcode:
Tips & Tricks
This section might grow with time as we add some tips & tricks.
1. Center the logo
If you’d like to center the logo, both the logo image and the text logo, follow the below instructions, relevant to the logo type, and add the custom CSS code to Appearance > Customize > Additional CSS or to a child theme:
Logo image and Text logo
#logo {
float: none;
margin: 0 auto;
}
Troubleshooting
- If you notice some extra spacing between elements, navigate to your WordPress dashboard > Settings > Page Builder and click on the Layout tab. If “Row Gutter” and “Row/Widget Bottom Margin” have a value other than 0, remove that value, type 0, and save.
If you still notice spacing, then it could be that you manually added a number that is higher than 0 to the Gutter, Margin, or Padding settings when you edited a row.
Widgets have margin and padding settings as well, so make sure to verify those.
Lastly, if you still have unwanted spacing, if you added CSS code either in Appearance > Customize > Additional CSS or in a child theme, verify those to see if you added spacing there. - If columns aren’t displaying as intended, or some sections are not resizing properly, or it looks different from our demo, such as images displayed vertically rather than horizontally, navigate to your WordPress dashboard > Settings > Page Builder > Layout. Choose “Always” for this setting: Use Legacy Layout Engine.