
Forward
Thank you for purchasing the Forward theme. The instructions here will guide you through the theme so you can get your site up and running.
Table Of Contents
- Customizer
- Create A Homepage
- Campaign Extension and Name Your Own Price Extension plugins
- Navigation Menus
- Staff And Sponsors
- Mailchimp & Newsletter Widget
- Troubleshooting
Before beginning, note that you can decide to have any page be full width rather than the default Boxed width. This does not apply to Posts but only Pages. To do so, edit a page and look at the right side where it says Template. In the Template dropdown, select Full Width Page. That page is now full page.
To render the whole site full width, see the point below in Customizer > Content.
Customizer
All of the theme’s styling and functional options are located inside the WordPress “Customizer.” You can find the customizer by going to the Appearance section in your Dashboard and clicking on Customize. The options in the theme are broken up into several different sections to help you find what you’re looking for. Here’s a rundown of what’s in each section:
- Branding
- Upload logo and favicons (the little icons that go in a web browser’s navigation bar).
- Set the site’s title and tagline.
- Site Background
- Upload an image background, set repeating options and position.
- Choose a background color.
- Navigation
- Choose colors and fonts for the navigation menu.
- Select the menu that is displayed in the navigation (the menus are created elsewhere).
- Choose to include search box and set mobile menu name.
- Content
- This section deals with the main content areas of the site.
- Choose colors, fonts and sizes for the main areas of text.
- Options for the image lightbox are here.
- The default page/post layout is also set here.
Choose between displaying your whole website in full width (edge to edge) or block width (everything in the center with a background appearing on both margins). To make a single page full width rather the whole site, you can edit that page and choose the full width page under Template.
- Front Page
- Allows you to select a page that will be on the front of your site or to display your latest posts.
- Options for the homepage template’s slideshow.
- Footer
- Sets the text displayed in the right hand and left hand sides of the footer.
- Footer colors can also be selected.
- Buttons
- Colors for buttons and their hover states.
- Alternate button colors are for WooCommerce users. These will set the color of purchase buttons on the individual product view.
- Widget Styles
- This panel allows you to set the colors and fonts for standard widgets and the action widget.
- Widgets
- This conditional panel allows you to set the actual widgets that are available for the page you’re viewing.
- These can also be set by going to Widgets in the Appearance section of your dashboard.
- Advanced
- This tab has an option for adding in Custom CSS that will be used on your site.
The customizer offers a preview as you set options. If you don’t like your changes, you don’t have to make them live. It’s a handy tool to customize the look and feel of your site.
Homepage
To set up your homepage, go to the Pages section in your dashboard and click Add New. This will create a new page for you. Enter a title for it at the top and then look in the right hand column for a box labeled Page Attributes. In that box, there is a drop-down menu for templates, labeled Template. Choose “Home” for the template and publish your page. If you plan to have a blog, go on and create a page for it as well. You don’t have to select a specific template for it.
Now go to the Customizer (Appearance > Customize) and click on the Front Page section. Here you can choose what your front page displays. Click on the option for a “Static Page” and then from the Front Page menu there, select the homepage you just created. For the posts page, select the blog page you just published. Save your options and that will set the new front page for you.
Slideshow
The front page features a slider for you to use. The slideshow only shows up when you use the template “Home”. To add your slides, go to the Media section in your dashboard and click on Slides. Each slide can either have a background image or a video. Add multiple slides to create a slideshow. To show you how to create and use slides, here is a quick video (it’s made with our other theme called Foundation, but the process is similar):
As soon as you add one or more published slides, the slideshow area will show up on your homepage. To disable any or all slides temporarily without deleting a slide, simply set that slide as “Draft”. If all slides are disabled, the slideshow will no longer show up on the homepage.
Homepage Content
The content for the homepage template comes entirely from widgets. There are two spots you can add in your widgets, and both are in the Appearance section in your WordPress dashboard.
- Appearance > Customize > Widgets.
- Appearance > Widgets.
The widget area for the homepage is called Homepage. You can add the widgets that you’d like to have on your homepage there. Here are the ones used in the demo:
- Campaign Widget
- Facebook Page Widget
- Mailchimp Widget
- Attention Widget
- Contact
- Sponsors Widget
Campaigns and Name Your Own Price
The campaign section of the demo is site is created with the WooCommerce plugin. This excellent shopping cart handles all of the transactional elements for us, allowing you to collect donations and sell items if you’d like to. In order to use our campaign plugin, you’ll need to install and activate WooCommerce first.
Once you have WooCommerce set up, you can begin creating campaigns and setting up the name your own price products. The instructions for downloading and using the campaign plugin and the Name Your Own Price plugin are found on this page: https://www.organizedthemes.com/campaign-extension-for-woocommerce-plugin/
Navigation Menus
You can set up your site’s navigation menus by going to the Appearance section in your WordPress dashboard and selecting Menus or in Appearance > Customize > Menus. Here’s a quick video to show how the first option works:
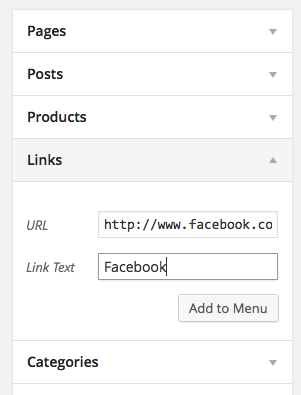
The social icons in the right hand side of the navigation bar in the demo are made with a navigation menu. If you’d like to do this on your own site you can. Create a new navigation menu just for your social icons. Look in the left hand column for the “links” section. You’ll use this to add in your social icons. Just enter the full URL to your profile on the social network you’d like to link to. Add a label for it, the name of the network would be a good idea. Then add the link to your navigation menu. Repeat that for all the networks you’d like to add and save your menu. Then, assign your menu to the “Social Icons” menu location. That will cause your icons to be visible there.
Here are the social networks with built-in icons:
- YouTube
- Skype
- Vimeo
- Google+
- Flickr
- Dribbble
There is also an option in the customizer to add a search box to the right hand side of the navigation bar. If this option is used any social icons will be to the left of it.
Mobile Navigation Label
You might not want to use text for the mobile menu name but instead an icon or symbol. To do that, you need to change its label in Appearance > Customize > Navigation > Mobile Navigation Label. You can choose an icon from the following website or from another (you can do some research): https://www.symbolcopy.com/menu-symbols.html
This is a good option: ☰
Copy and paste it in the Mobile Navigation Label field.
Staff and Sponsors
In Forward you can create lists of staff and sponsors. These two areas work the same so to keep things simple, we’ll walk through staff. The same directions also apply to the sponsor section.
First you’ll need to add a staff member. To do that go to the Staff section in your dashboard. Click the Add New Staff Member link. You’ll place the name of the staff member at the top. The main content area will be where their “bio” will be placed. Below that is a box where you can place the details about this staff member. You can give them a job title as well as fill in their email address, phone number and the URL’s to their various profiles on social network sites. The supported networks are the same as the list in the navigation menu section above.
You’ll also want to add a featured image. This will be the picture of your staff member that is displayed on the front end of the site.
After you’re finished adding content, publish your staff member. Next go to the Pages section in your dashboard and create a new page. Look in the right hand column for the attributes box. Choose the “Staff List” template and publish your page. This new page will list all of your staff members in one place.
If you need to have more than one list of staff you can. To do that you’ll need to make use of “Staff Groups.” These work basically like categories do posts. When you’re editing a staff member, look in the right hand column and you’ll see a box labeled staff groups. Here you can create a new staff group or add your staff member to an existing group.
The idea here is to add the staff you’d like to have displayed together to the same staff group. Once that’s done, you can add your staff group to your navigation menu just like you would a page. Staff groups should be one of the content types listed on the left hand side of the navigation builder. If it’s not, click the screen options tab in the top right hand corner and make sure the box by staff groups is checked.
When a staff group is clicked by a visitor on the front end of your site, they’ll be taken to a “page” (really a dynamic archive) showing all the staff that have been assigned to that group. You can create as many groups as you need to in order to display your staff as you’d like to.
The same principal applies to sponsors as well. Sponsors do have one additional option for them. There is a sponsors widget you can use to display the sponsors from a sponsor group together. You can see an example of that near the bottom of the homepage in the demo.
How to order staff and sponsors
When editing a staff or a sponsor, look at the right sidebar and find Page Attributes. In that box, you’ll find Order. The lower the number, the higher the position in the list. E.g.: Staff 1 has an Order of 1. Staff 2 has an Order of 2. Staff 3 has an order of 0. Staff 3 will appear at the top.
Here’s a tip to help you manage this: Start with Order 0 for the staff/sponsors that should hold the first place, but add an increment of 10 per each additional staff/sponsor. So, next one will have an Order of 10, then 20, and so on. That way, you can staff/sponsors in between, e.g., Order 5, 14, 29, or any number you’d like.
Mailchimp & Newsletter Widget
Forward includes a Mailchimp widget that you can use to create a newsletter with. To use it you’ll need to sign up for an account at Mailchimp. Their service is free for lists of up to 2,000 email addresses (contacts) and 10,000 emails sent per month.
Once you’ve signed up for an account, you’ll need to create your first “list” of subscribers. After that list is created, you can get the list ID. You’ll need to place that ID into the widget here in WordPress. The other information you’ll need will be inside your own account there. Click on your name in the top right corner and choose Account. Next choose Extras and then API Keys. On this screen you can create a new API key. Once it is made, copy it and paste it into the field for it in the widget.
That will allow your Mailchimp widget to connect to your account and add your subscribers as they sign up.
For a newsletter system that works from inside of WordPress and that allows you unlimited mailing lists, subscribe forms, and subscribers (contacts), consider our advanced Tribulant Newsletter plugin.
Troubleshooting
- If you find that the fonts are not like the ones on our homepage, even after setting up the demo, then follow these steps:
- Navigate to WordPress > Appearance > Customize.
- Go through all the sections, starting with Branding, to find the fields that have a font family, e.g., Open Sans or Lora.
- When you find one, note the font name and then click on the dropdown, select another font, and finally re-select that same font as the one you noted. You can choose a font below or above that one and then re-select the same one, if that helps.
- This will cause the font to be officially used. The Customizer thinks that we’re not using that font and just needs a “refresh” to apply it.
- At the same time, you can apply a different font size, if needed.
- Proceed with all other sections in the Customizer and the fonts will be reset (or you can choose your own fonts meanwhile).
I sincerely hope you enjoy using our Forward theme. If you have any questions, please browse the forum or contact us and I’ll be happy to help you out.