
Campaign Extension
Thank you for using our Campaign Extension for WooCommerce. This document will walk you through how to make use of the plugin.
Install WooCommerce
This extension requires the WooCommerce plugin be installed and activated in order to function. If you haven’t already, go on and install and activate WooCommerce on your site. You can do that by going to the Plugins section in your WordPress dashboard and selecting Add New. Search for WooCommerce and install the plugin.
Once the plugin has installed itself, click on the activate link. WooCommerce will ask to install a few pages in order to work properly. Go ahead and do that.
Download & Install Campaign Extension for WooCommerce
Now, you can install the campaign extension. First download it from our site. Then, go to the Add New plugins screen in your dashboard again. This time click on the Upload Plugin button at the top of that screen. You can use the file browser there to find the zip file you downloaded from our support site. Follow the prompts to install/activate the extension.
Create a Campaign
Now you’re ready to create a campaign. Go to the Products section in your WordPress dashboard and select Add New. This will bring you to the screen where you can create a campaign “product.”
Below the main content box you’ll see a box labeled Product Data. On the left hand side of this box there are several tabs. Click on the “Campaign” tab. To make this product a campaign, check the box at the top of this screen. Right below that there is a box where you can enter the goal of your campaign. It will use the default currency that is set in WooCommerce’s settings.
The next options there are for changing the “Add to Cart” button text to something that fits better with fundraising like “Donate” or “Give.” You can enter any text you’d like to there and it will apply to that product. You can have different button labels for each campaign if you’d like to.
The “Raised of” box allows you to customize the text that goes between the amount raised and your goal amount. You can customize that to fit your needs to.
Once you’ve added all the pertinent information you can publish your campaign product. It will then be available for “sale.”
Campaign Widget
The plugin adds one new widget to your collection. This campaign plugin will allow you to display a campaign in any sidebar area. It will show the featured image, short description, progress and a buy button. It’s a good way to draw attention to your important campaigns.
Tips for Campaigns
Since raising money is a bit different from selling shirts, here are some tips to help make it smoother.
-
Shatner Name Your Price
This is another WooCommerce extension that allows you to make products available via “name your own price.” That way your donors can give as much as they’d like to. You still need to enter some number into WooCommerce’s price box in order for this plugin to work properly. If you’ll accept any amount than enter zero for the price. If you’d like to enforce a minimum amount you can enter that as well.
-
Virtual Product
For items that are strictly donations, make them “virtual.” There is a checkbox at the top of the product data box where you can select that. It’ll remove the shipping and other considerations that aren’t necessary from the product giving a streamlined experience.
For New Sites
It may be necessary if you’re creating a new site and using WooCommerce 2.2 to manually add an order in order to have the progress bars display. To do that, in your WordPress dashboard click on WooCommerce on your left hand side and choose orders. At the top of this screen there will be a button to add a new order. Click on that.
Now you’ll be on the “Add New Order” screen. In the “Order Details” box at the top, change the order status from “Pending Payment” to “Completed.”
Below that you’ll see the “Order Items” box. Click the button at the bottom labeled “Add Line Items” and then “Add Products.” Start typing the name of one of your campaign products and then select it. On the right hand side by the total, you’ll see a pencil icon. Click on it and change the amount to zero. Then click the save button at the bottom of the Order Items box.
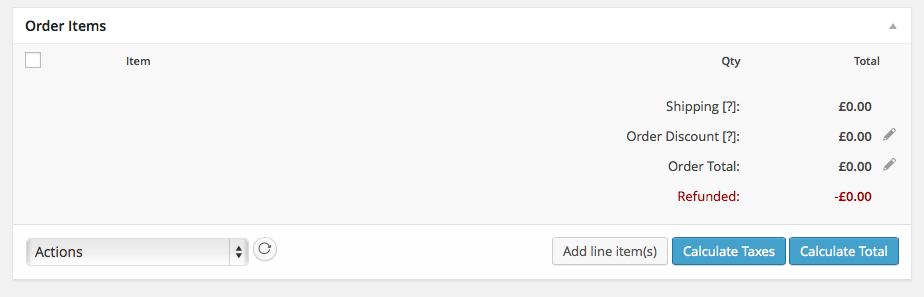
Now you can click the “save order” button and that should take care of it.